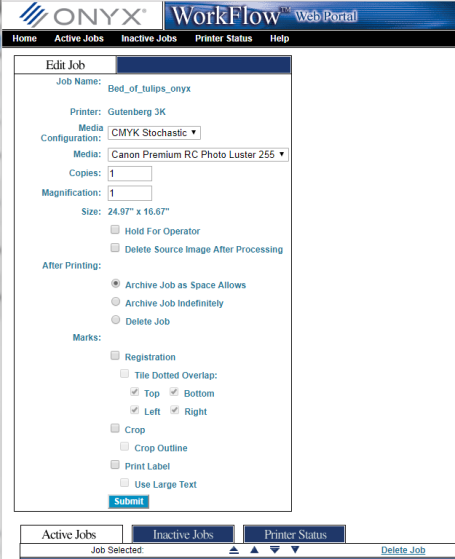
The Web Portal (Figure 1) allows you to send jobs to RIP-Queue from a remote computer on your local network. This includes sending images from Macs and other Operating Systems. In the Web Portal you can view the Active Jobs (equivalent to the Jobs Ready to Print area in the RIP-Queue window), the Inactive Jobs (equivalent to the Buffered Jobs Area in the RIP-Queue window), and even control many job options like number of copies, magnification, holds, and marks.
Open RIP-Queue. In the bottom right corner of the window, the message "Starting HTTP service on port 80" displays in the RIP-Queue Console.
Open your internet browser.
In the address bar of your browser, type http:// followed by the name of the machine on which RIP-Queue is running. For example, http://Katherine2. If you have changed the port number in RIP-Queue, you must follow the name of the machine with a colon, then the port number (http://Katherine2:8080).
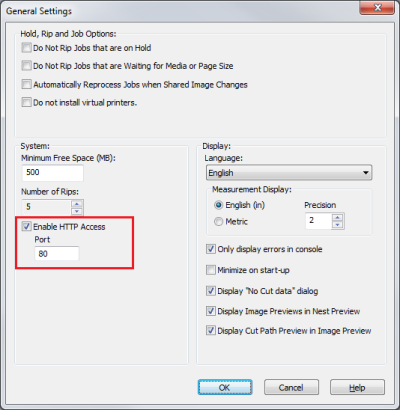
The Web Portal uses port 80 by default; however, if a service is already using that port, RIP-Queue displays an error in the RIP-Queue Console. To resolve this issue, change the port number in the General Settings - System of RIP-Queue using these steps:
In RIP-Queue, select General Settings form the File menu. This opens the General Settings dialog (Figure 2).
In the Submit New JobAn image coupled with RIP-Queue settings. area of the Web Portal, click Browse. This opens the Choose File dialog.
Browse to the file you want to submit, and click Open.
In the Web Portal, select the printer and Quick SetA group of settings that is applied to images to create jobs in an efficient manner. (if applicable) that you want to use, and click Submit New Job.
Once RIP-Queue finishes processing the image, click Home on the Web Portal page to refresh the Active Jobs list. It may take several minutes to process the job depending on the image size.
If the newly submitted job does not appear in the Active Jobs List, check the RIP-Queue Console for information about the image.
You can edit a job in the Web Portal by clicking on the job name. This opens the Edit Job dialog. You can modify many settings in this dialog including holds, number of copies, and magnification. Removing any holds from a job will automatically print the job.
Placing a checkmark in the box next to the job name allows you to control a job by deleting, moving, holding, or sending the job to the Inactive Jobs List.